|
| startuxcode
manual |
03
december, 2003 |
 simple
tasks
stop just right here.
startuxcode
does have a learning curve.
keep this in mind before giving up.
startuxcodes' backoffice doesn't offer you any eye
candy and stupid icons.
instead, it focus on what it matters and gives wings to your
imagination using powerfull tools and features that will greatly
reward you in the end.
- article's basics
- approving
an article
go to your site and subscribe a user, let's say Beowulf.
login as Beowulf and submit an article. this doesn't require any
explanations. if you're a systems' administrator or even lesser, an
habitué web user you know how to do this.
now login to the backoffice and insert "3" (without the quotes) in
"journalists table" at "comments/from" article:
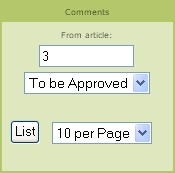
fig. 1
click in "list", or simply press enter key.
don't touch the dropdown menus.
you will see this:

fig. 2
now select "Beowulf (registered user)" and
copy. you will need this later on.
you can see that the article is "to be approved".
click in "create article".
now you are in the article with the power to put it in the main page
for verybody to see, but first let's see the meaning of the several
fields of the article approval form:
- title:
this is the of title the article;
- synopsys:
this the text part that appears in the article when it goes to the
mainpage after being approved;
- text:
this is the part of the article you can read when clicking in "read
more". this is usefull for big articles. this way you can split it in
two parts and not compromise the layout of the mainpage;
- author:
tha name of the person that sent the article (read ahead);
- image
and price: not applicable in regular articles. we'll talk about this
later.
now, to approve the article, you must:
- in
the "editor corner", switch the drop-down menu from "to be approved" to
"approved";
- in
subjects (needless to say that subjects is what your users see as
topics), select only one that suits the article, in
this case startuxcode;
- now
paste what you've coppied before in to the "author" box;
- save.
don't touch anything else for now. we'll see what the various other
options are for later;
so there you have it. the article in the main page:
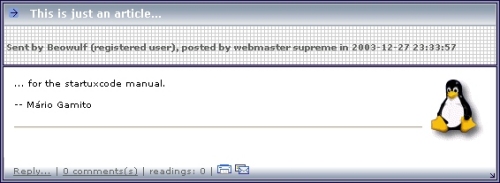
fig. 3
later on we will see the meaning of #3 to
get the articles in stand-by to be approved.
let's go back to the backoffice and see
what's going on. click in "journalists/articles/list":
fig. 4
and see that at the top of the page you have
the title of the article you've just submmited along with an id (65 in
this case). if you click on it, you can edit the article and resave it
with the changes you've just made.

fig. 5
for now just keep in mind that everything in startuxcode has an id and
that they are very usefull in day to day site administration.
-
spicing an article a little bit
startuxcode let's you embbed objects in an article. two of them has
native support in the backoffice: files (e. g., images) and microsoft™
word documents.
let's add a picture to the article we've submitted. go to backoffice,
click in "journalists/articles/list". now click on the article you've
created before to enter edit mode.
you should see this:

fig. 6
click in upload and to get a new page with a
form to fill (in this case a picture of myself :P):
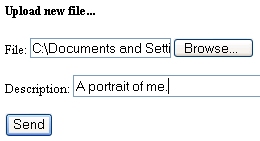
fig. 7
click in send button to have another
surprise: a windows opens with the html ready to copy & paste:
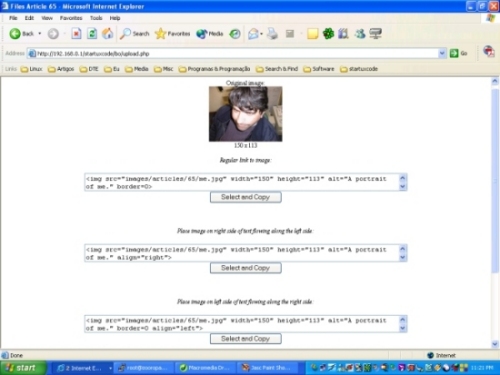
fig. 8
let's select the first piece of code, copy
it and paste it in the article:
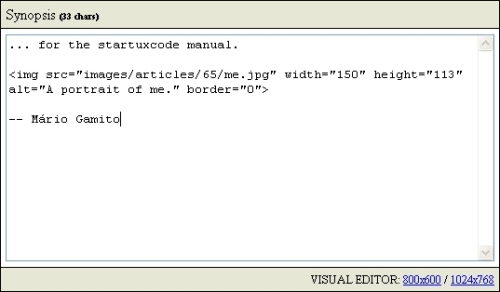
fig. 9
now save the article and go to your site's mainpage to see the results:
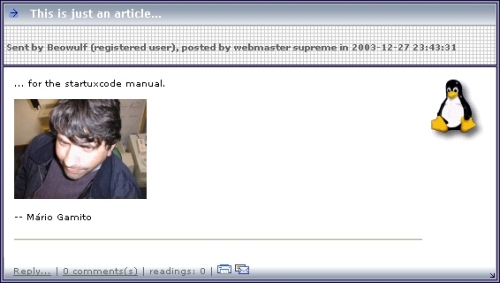
fig. 10
nice, isn't it :-) ?
now, where is the uploaded image ?
if you run the command
# ls
/pathtoyourstartuxcodeinstallation/images/articles/65
you'll find there the uploaded file. remember 65 ? it's the articles'
id.
it works with any kind of file. if you have a bunch of them, you can do
the upload by ftp or scp and then in the article make the links to them.
|
|
|
| startuxcodes' engine code is Copyright © 2003 by Mário Gamito |
|